My VS Code workflow for developing with Atlas Stream Processing
Working hands-on with Atlas Stream Processing is a daily part of my routine — whether I’m writing examples, setting up demos, coding for internal use, or helping customers with their implementations. Over time, I’ve refined a workflow that seamlessly integrates VS Code, Git/GitHub, and Atlas Stream Processing , making development smoother and more efficient. In this post, I’ll walk through my process, sharing tips and best practices to help you build a workflow that fits your needs.
VS Code as the core
VS Code is my favorite editor for writing pipelines in ASP. It’s at the core of my workflow. If you haven’t used it before, it’s grown to be massively popular for a reason: it just works. You can download it here.
That said, I still use the MongoDB Shell to execute files in the terminal, I find this to be the most productive workflow (when using files as I do). You can download the MongoDB shell here.
Once you get VS Code installed, you will want to customize it to your liking and the task at hand (writing stream processors for Atlas Stream Processing). Let’s talk about some of my favorite extensions.
Key VS Code extensions
- The MongoDB extension for VS Code.
- GitHub Extension. Git/Github, version control == good.
- The VSCodeVim extension. My brain and fingers just use vi commands without thinking. Gotta have it.
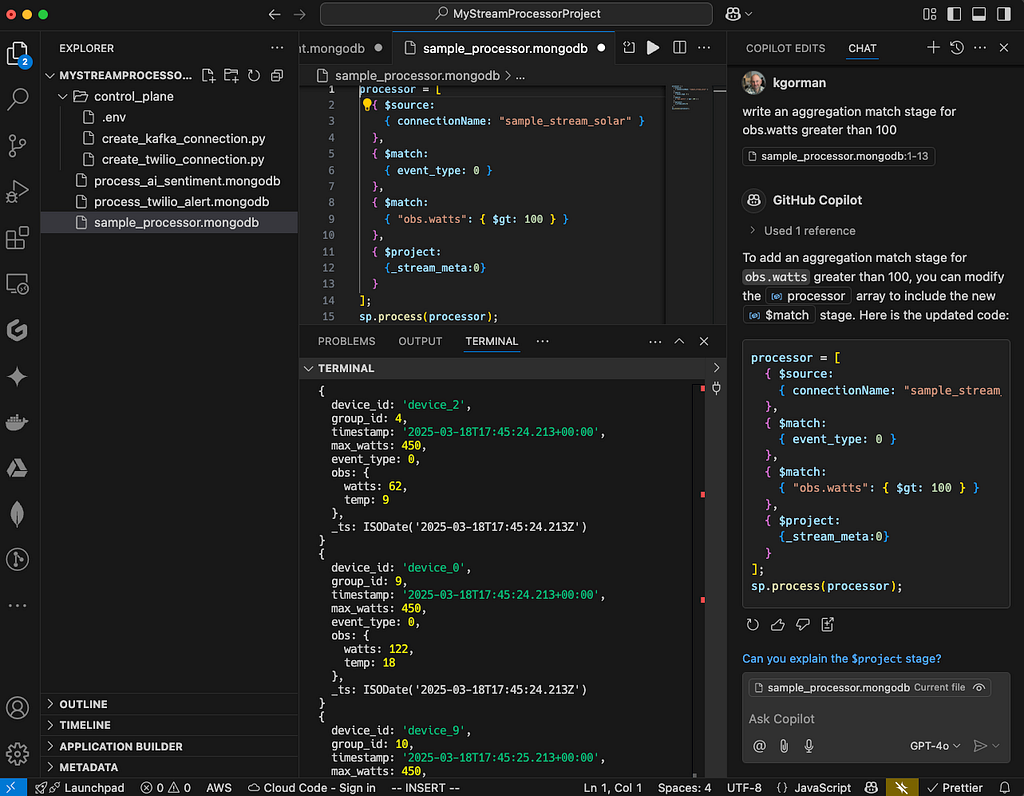
- CoPilot Extension. Let’s just say these days if you aren’t using some AI code assist you are probably developing much slower. Atlas Stream Processing requires some work to get good answers. More on this in another post.
Workflow — all about files
This may sound obvious, but I use files for everything. Files define discrete processors or scripts to create control plane primitives. I like to have each processor as a named file with a known purpose. I save each pipeline to a file with the optional command to create/run it. When I develop processors, I use the .process() method to execute them as I build them stage by stage, then as I graduate it to a named processor that runs in the background full time, I use .createStreamProcessor() and .start()/.stop() to interact with it. I store control plane files in a subdirectory and the processors in the top-level directory, but sometimes subdirectories if it’s a complex project with lots of processors.
Now, I will point out that my usage of the MongoDB plugin is atypical. I edit processors in VS Code, but I don’t execute them from there using the plugin. I like a bit of command line in my life, so I use Mongosh for executing the code. My preference, but I want to point out you can do it BOTH ways, and the plugin and VS Code work well, no matter your preference.
Something like this is my typical structure:
MyStreamProcessorProject              # the name of the git repo
    control_plane                     # control plan subdir
        .env                          # creds for Admin API, connections
        create_twilio_connection.py   # a connection
           # a connection

    process_ai_sentiment.mongodb      # a processor
    process_twilio_alert.mongodb      # a processor
This helps with hygiene and reusability. Plus, files are a nice way to interact with git and Github — use your normal workflow for source control just like any other files.
The terminal
I use the terminal as my execution environment. I open a terminal at the bottom of the window inside VS Code to execute the code and see the results. This way I have one window for all my work and I don’t have to go searching through other terminals — it’s all encapsulated inside one window specific to the repo/use case. To open the terminal in VS Code do CTRL ^`.
Storing credentials
I store the credentials for a given project on my local machine as a dot env file and source it for use in my projects. Put it on your ignore list, don’t be checking that file in ;-).
The Atlas Control Plane
With Atlas Stream Processing we need to access the control plane to create Stream Processing Instances (SPIs) and create connections to other systems like Kafka. I find that I seldom create SPIs, I tend to create one or two and use them for various projects or purposes identified by some logical name like MongoDB_local_demo , etc. Typically in the same Atlas Project. I do however seem to create connections more often depending on the use case — perhaps tying into a Kafka data source or defining a new https endpoint to hit like integrating with Twilio or OpenAI.
To create connections and work with other control plane activities I use Python and the admin API. Python helps me script and control logic around the API, then calls the API to create connections or otherwise interact with the system. I just like it much better than bash/curl for this purpose.
Generally speaking, the code for creating connections looks like what I have below. You can copy this as a stub for creating connections in your projects. Notice I use credentials from the OS environment and pull them into the script.
import pprint
from requests.auth import HTTPDigestAuth
import requests
import os

# Environment variables
ATLAS_USER = os.environ["ATLAS_USER"]
ATLAS_USER_KEY = os.environ["ATLAS_USER_KEY"]
INSTANCE = os.environ["ATLAS_INSTANCE"]
GROUP = os.environ["ATLAS_GROUP"]
OPEN_AI_URL = os.environ["OPEN_AI_URL"]
OPEN_AI_KEY = os.environ["OPEN_AI_KEY"]

# Base URL
base_url = "https://cloud.mongodb.com/api/atlas/v2/"

# Authentication
auth = HTTPDigestAuth(ATLAS_USER, ATLAS_USER_KEY)

# Headers
headers = {
    'Accept': 'application/vnd.atlas.2024-05-30+json',
    'Content-Type': 'application/json'
}

# Send headers
send_headers = {
    "Content-Type": "application/json",
    f"api-key: {OPEN_AI_KEY}"
}

# Data payload
data = {
    'name': 'ChatGPT',
    'type': 'Https',
    'headers': send_headers,
    'url': OPEN_AI_URL
}

# URL and response
url = f"groups/{GROUP}/streams/{INSTANCE}/connections"
response = requests.post(base_url + url, auth=auth, headers=headers, json=data)
pprint.pprint(response.json())
I execute this script in the terminal, as I mentioned above, and I create a virtual environment in the root directory of the project for the libraries I need for the project sourced from requirements.txt. You only need to do this once. Something like this:
# Create a virtual environment (replace 'venv' with your preferred name)
python -m venv venv

# Activate the virtual environment
# On macOS/Linux:
source venv/bin/activate

# Create a requirements.txt file (this will be empty initially)
touch requirements.txt

# Install dependencies from requirements.txt (if it has content)
pip install -r requirements.txt

# If you want to add packages, install them and update requirements.txt
pip install some-package another-package
pip freeze > requirements.txt

# Verify installation
pip list
Then to create connections just execute the file:
python create_openAI_connection.py
The Atlas Data Plane
Now let’s move on to creating and running processors. But before we dig in let’s briefly discuss how I compose stream processors.
Composability with Stream Processors
Similar to the MongoDB aggregation language, Atlas Stream Processing is highly composable, and the developer can choose what makes sense based on the task at hand. One common way is to define a stream processor stage as variables, then assemble them and run them. For example:
let source = {$source: {connectionName: "kafka", topic: "sourceTopic"}}

let sink = {$emit: {connectionName: "kafka", topic: "sinkTopic"}}

let processor = [source, sink]

sp.process(processor)
Another way is to write the entire pipeline as in one block to be executed at once like:
processor = [

  {$source: {connectionName: "kafka", topic: "sourceTopic"}},

  {$emit: {connectionName: "kafka", topic: "sinkTopic"}},

]
sp.process(processor)
I tend to choose the former when just playing around and when I am not sure what I want just yet, then move things to the latter as my program evolves and grows.
Tying it all together
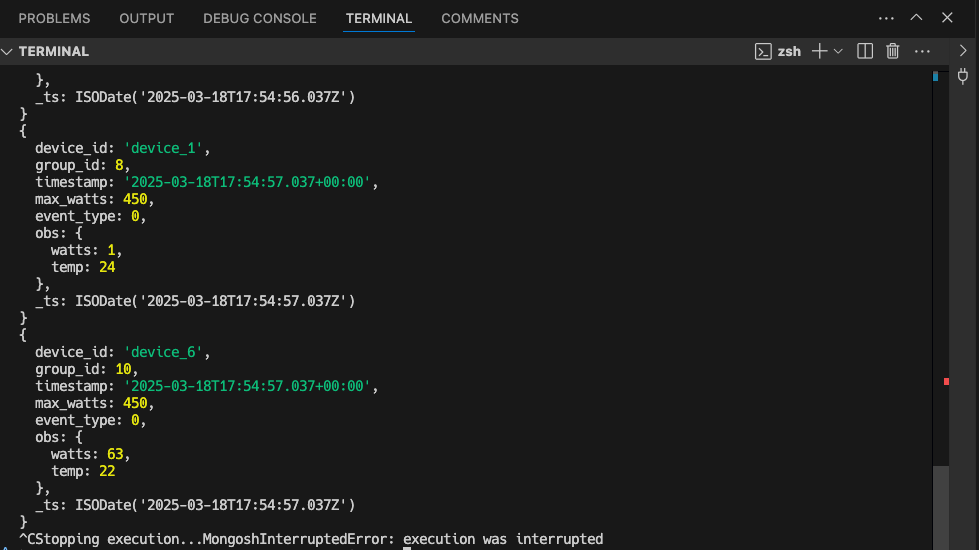
During development I will execute the processor from the command line using Mongosh as I build the processor. Once I am happy with it, I will again use Mongosh, but issue create() and let it do it’s thing, only checking back in using .stats().
Something like this:
MyStreamProcessorProject % mongosh "mongodb://atlas-stream.yyy.a.query.mongodb.net/" --username yy --password xx -f sample_processor.mongodb
Then you can inspect the results (if any) in the terminal window. Up-arrow-enter is your friend here.
What’s next?
I’d love to hear what others are doing and how you set up your environment or ways I can improve mine! Feel free to comment below. Would you like a follow on post about using Copilot with Atlas Stream Processing or more detail on tests or CI/CD patterns? Let me know — we have a long roadmap for making the product better and better and would love suggestions. I promise to post updates as we do.
Better, if you want to try this for yourself, get a MongoDB Atlas account and take it for a test spin. https://www.mongodb.com/products/platform/atlas-stream-processing
My VS Code workflow for developing with Atlas Stream Processing was originally published in Towards Dev on Medium, where people are continuing the conversation by highlighting and responding to this story.